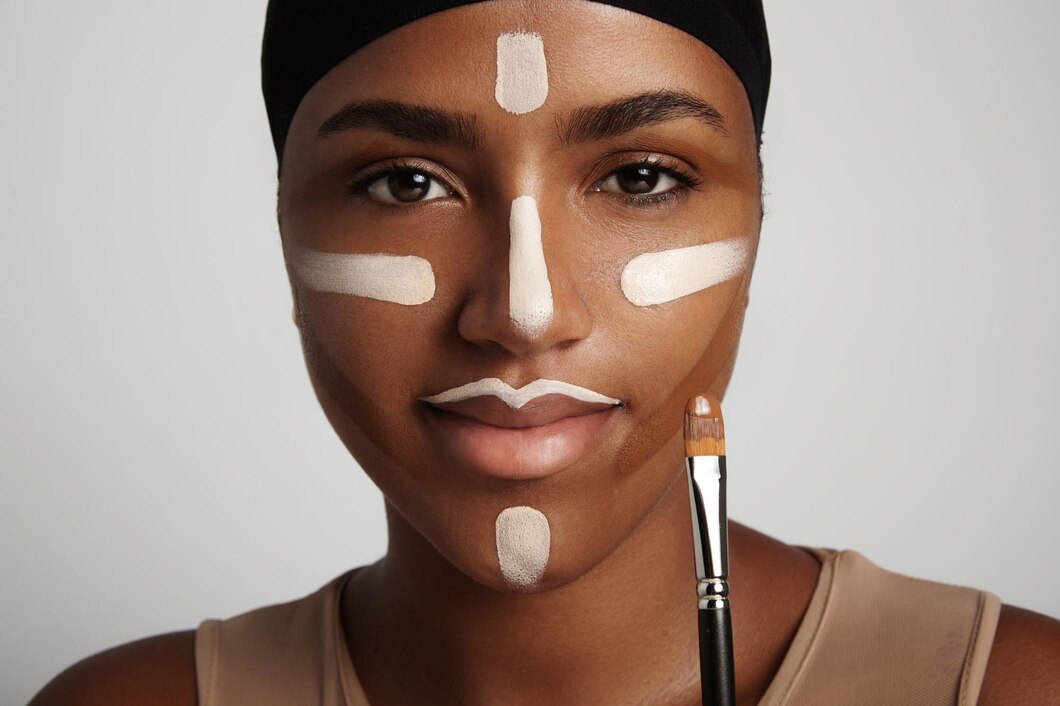
Contouring has become a staple in the beauty world, offering the ability to enhance and define facial features with the strategic use of makeup. Whether you’re aiming for a subtle, natural look or a more dramatic, chiseled effect, mastering the art of contouring can transform your appearance. Here’s a comprehensive guide to help you navigate the techniques and tips for perfecting your contour.
Understanding Contouring
Contouring involves using makeup to create shadows and highlights on the face. By applying darker shades to recede certain areas and lighter shades to bring others forward, you can sculpt your face to enhance your natural bone structure.
Essential Tools for Contouring
- Contour Products: These come in various forms, including powders, creams, and sticks. Choose a product that is two shades darker than your natural skin tone for contouring and one that is two shades lighter for highlighting.
- Brushes and Blenders: Invest in a good set of brushes and blending sponges. A contour brush with an angled edge is ideal for precise application, while a blending brush or sponge helps achieve a seamless finish.
- Setting Powder: A translucent setting powder helps lock in your contour and highlight, ensuring your makeup lasts all day.
Step-by-Step Contouring Guide
Prep Your Skin: Start with a clean, moisturized face. Apply a primer to create a smooth base for your makeup.
Apply Foundation: Use a foundation that matches your skin tone to create an even canvas. Blend it well to ensure there are no harsh lines.
Contour Placement:
- Cheekbones: Suck in your cheeks to find the hollows. Apply your contour product along this line, starting from the ear and stopping midway towards your mouth.
- Forehead: Apply contour along your hairline to reduce the appearance of a broad forehead.
- Nose: Draw two lines down the sides of your nose and connect them at the tip to create the illusion of a slimmer nose.
- Jawline: Apply contour along your jawline, blending it down towards your neck to create a defined jaw.
Highlight Placement:
- Under the Eyes: Apply highlight in an upside-down triangle shape under your eyes to brighten and lift the area.
- Bridge of the Nose: Draw a thin line down the bridge of your nose to make it appear straighter.
- Forehead: Apply highlight in the center of your forehead to bring it forward.
- Cupid’s Bow and Chin: Highlight the cupid’s bow above your upper lip and the center of your chin to create dimension.
Blend: Use a damp beauty blender or a blending brush to soften the lines between the contour and highlight. Blending is crucial for achieving a natural look.
Set Your Makeup: Use a translucent setting powder to set your contour and highlight. This step ensures your makeup stays in place throughout the day.
Contouring Tips for Different Face Shapes
- Round Face: Focus on contouring the sides of your face to create the illusion of length. Highlight the center of your forehead, under your eyes, and the chin.
- Oval Face: Lightly contour under the cheekbones and along the hairline. Highlight the forehead, under the eyes, and the chin to maintain balance.
- Square Face: Contour the jawline and the sides of the forehead to soften angles. Highlight the center of the forehead, under the eyes, and the chin.
- Heart Face: Contour the sides of the forehead and under the cheekbones. Highlight the center of the forehead, under the eyes, and the chin to balance the wider upper face with the narrower chin.
Common Contouring Mistakes to Avoid
- Using the Wrong Shades: Choosing a contour that is too dark or a highlight that is too light can create an unnatural look. Stick to shades that are two tones darker and lighter than your natural skin tone.
- Over-Blending: While blending is essential, over-blending can make your contour disappear. Blend enough to soften harsh lines but maintain the definition.
- Neglecting to Set: Skipping setting powder can lead to your contour and highlight fading or smudging throughout the day. Always set your makeup for long-lasting results.
Contouring is an art that, when done correctly, can beautifully enhance your natural features. By following these tips and techniques, you can achieve a sculpted, flawless look that highlights your best attributes. Practice makes perfect, so take your time to experiment and find what works best for your unique face shape and preferences.


