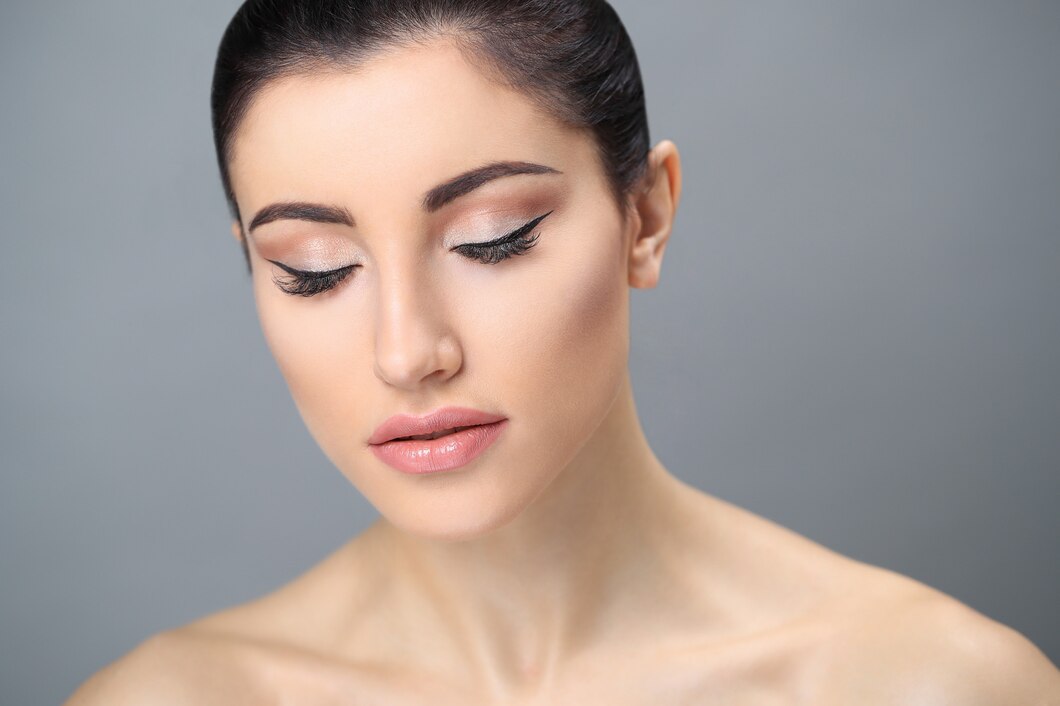
Winged eyeliner is a timeless beauty trend that can elevate any makeup look. Whether you’re going for a subtle, everyday style or a dramatic, bold statement, mastering the perfect flick can be a game-changer. This step-by-step guide will help you achieve the flawless winged eyeliner you’ve always dreamed of.
Step 1: Gather Your Tools
Before you start, make sure you have the right tools:
- Eyeliner: Choose between liquid, gel, or pen eyeliner based on your comfort level. Liquid eyeliner typically provides the sharpest lines.
- Angled Brush: If you’re using gel eyeliner, an angled brush will give you more control.
- Concealer and Brush: For cleaning up any mistakes.
- Tape or a Stencil (Optional): For guiding your line.
Step 2: Prepare Your Eyes
Start with a clean, moisturized face. Apply an eyeshadow primer or a light layer of concealer to your eyelids to ensure your eyeliner stays in place all day.
Step 3: Create a Base Line
Begin by drawing a thin line along your upper lash line. Start from the inner corner of your eye and work your way outward. Keep this line as close to your lashes as possible. This will serve as the base for your wing.
Step 4: Find Your Angle
Decide the angle of your wing by following the natural line of your lower lash line. For a more dramatic look, extend the line further out. If you’re unsure, use a small piece of tape or a stencil placed at the outer corner of your eye as a guide.
Step 5: Draw the Wing
Using your chosen eyeliner, draw a small line from the outer corner of your eye upward at your desired angle. This will be the bottom of your wing. Ensure both wings are even by comparing them as you go.
Step 6: Connect the Wing
From the tip of the wing, draw a line back towards your upper lash line, creating a triangular shape. Fill in the triangle with your eyeliner. For a more natural look, keep the thickness of the wing proportional to your eye shape.
Step 7: Perfect the Line
Go back to the base line you created in Step 3 and thicken it slightly, connecting it smoothly with the wing. Ensure there are no gaps between your lashes and the liner.
Step 8: Clean Up
Use a small brush and concealer to clean up any smudges or uneven edges. This step will make your wing look crisp and polished.
Step 9: Finish the Look
Complete your eye makeup with a coat of mascara or false lashes to make your eyes pop. You can also add eyeshadow or a bit of highlighter to your brow bone for extra dimension.
Tips for Success
- Practice Makes Perfect: Don’t get discouraged if your wings aren’t perfect the first time. Practice is key to mastering this technique.
- Steady Your Hand: Rest your elbow on a flat surface to steady your hand while applying eyeliner.
- Start Small: Begin with a small wing and gradually make it bigger as you gain confidence.
- Use Light Strokes: Apply the eyeliner in small, light strokes instead of one heavy line to have more control.
Achieving the perfect winged eyeliner takes patience and practice, but with this step-by-step guide, you’ll be able to create a flawless flick every time. Embrace the process, experiment with different styles, and most importantly, have fun with your makeup!